Published on: 27-12-19 02:12pm
Product Dreamlist enables your customers to create a dreamlist of all the products they wish to buy in your online store. With this amazing app, you can enable your customers to create categories and save respective products in those dreamlist categories.
The customer will require to necessary login in order to access the dreamlist and products added into it and much more.
Product dreamlist for Shopify: Video Guide
Configuration section of the app is divided into three sections:
GENERAL CONFIGURATION: From the general configuration section of the app you will set the email id and upload the shop logo, and you are done.
DREAMLIST CONFIGURATION: from dreamlist configuration, you can choose and select the dreamlist type, and you can edit the labels as well.
MAIL CONFIGURATION: Configure, edit, change and reset the content of mail sent to the client from this section of the app. Also clicking on the reset button all the settings of this section will get reset to default.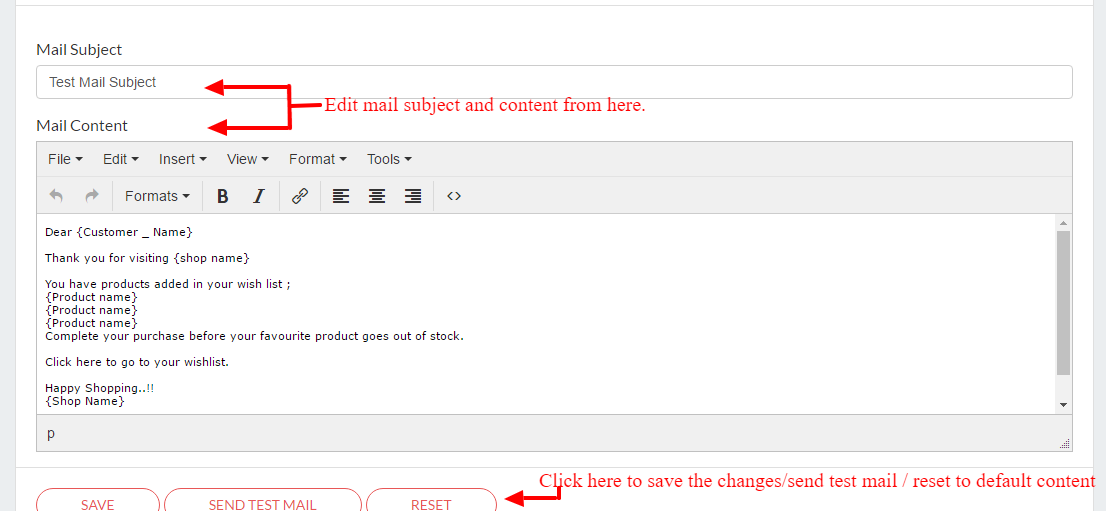
Customer Section
This section shows the list of all the customers along with details of a number of categories they have created for the dreamlist and other details. From this section, you can view each customer's details by clicking on the view button and can even filter on the basis of name/email ids & the number of categories.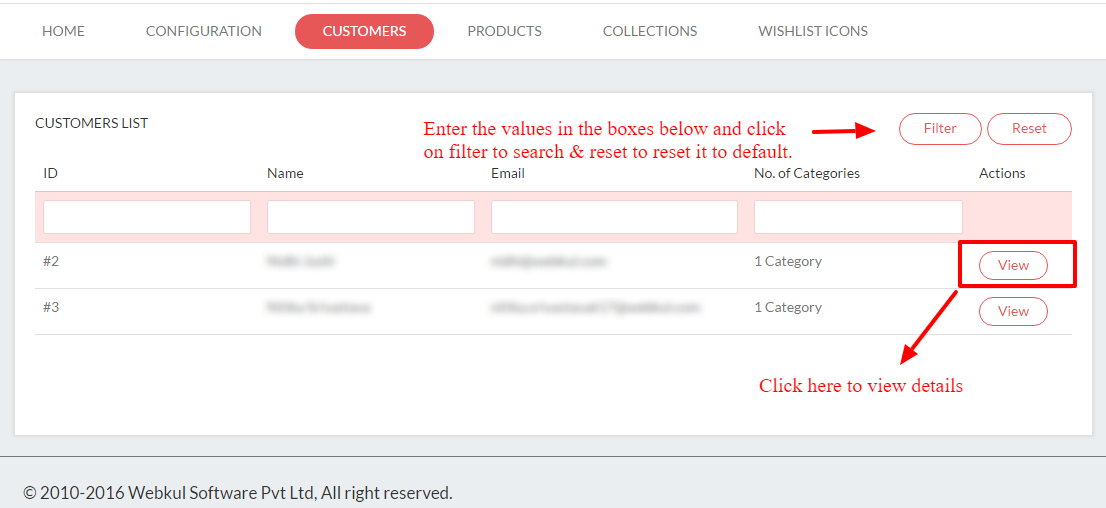
Note: The image dimension should be 197 x 52.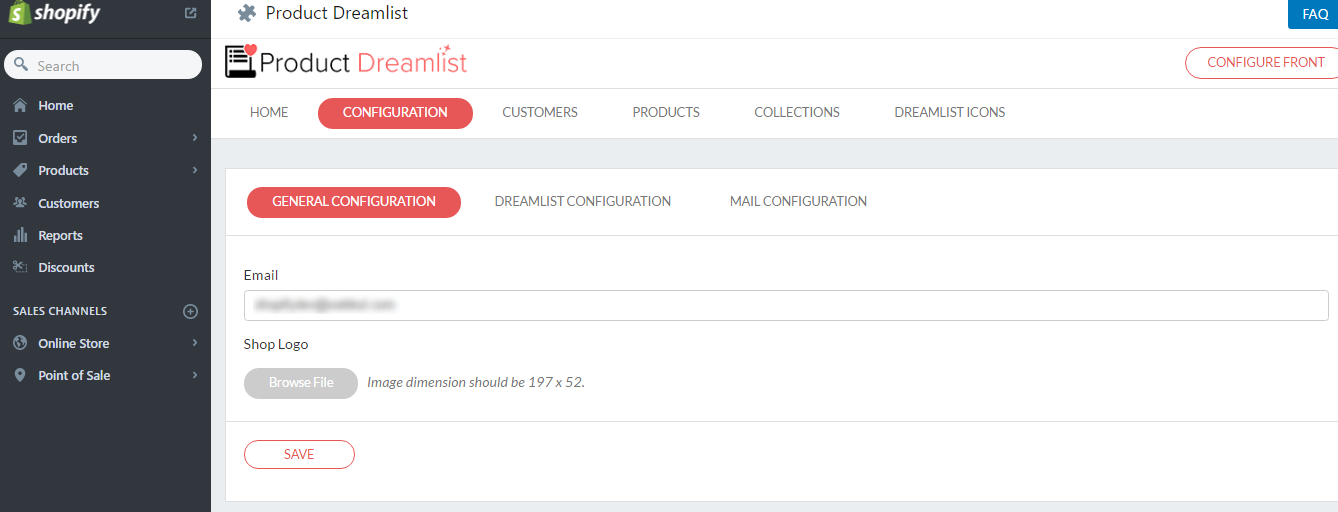
Clicking on the view button you will be redirected to the detailed page of that respective customer, having details about categories, no. of products added into it and you can even send reminder emails by clicking on the reminder button.

This section shows a list of products added to the number of customers' dream list. By clicking on the view button of each product you can have the details of customers who have added a selected product in their category.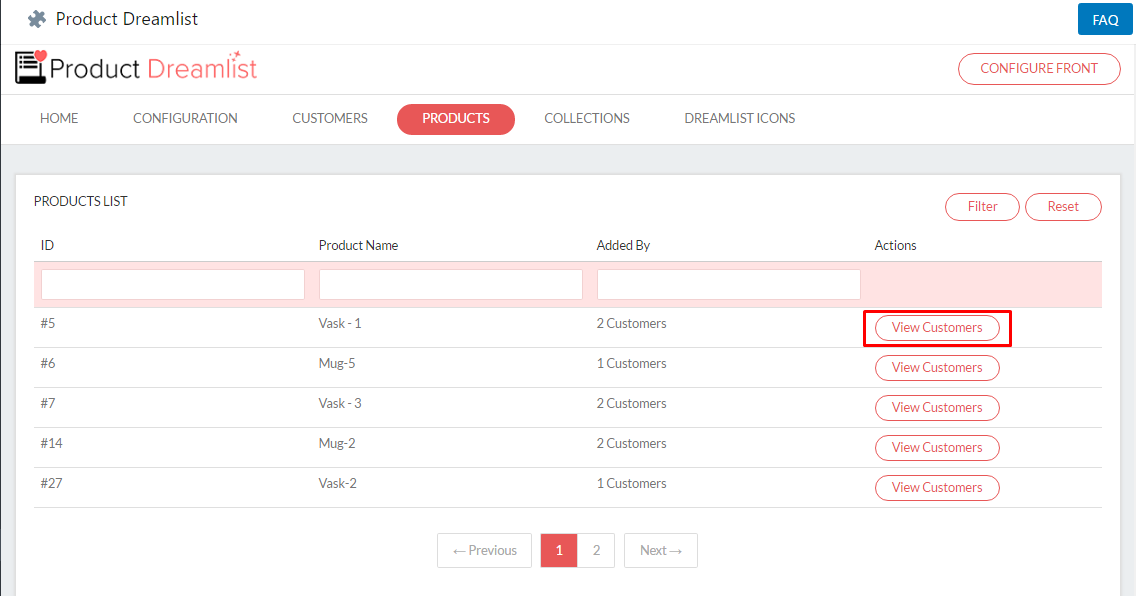
From this section you can view the list of all the collection and number of products added into it, you can even filter on the basis of the number of products, collection name, id, etc. And by clicking on the view button you will be redirected to that collection’s product page.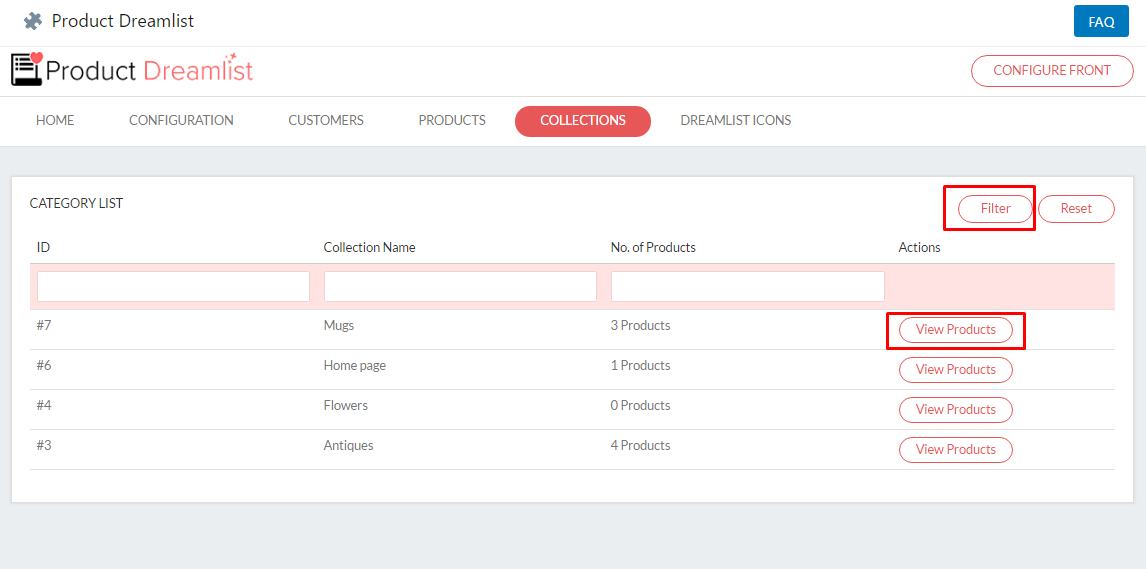
Choose the dreamlist icon from this section of the app and click on save.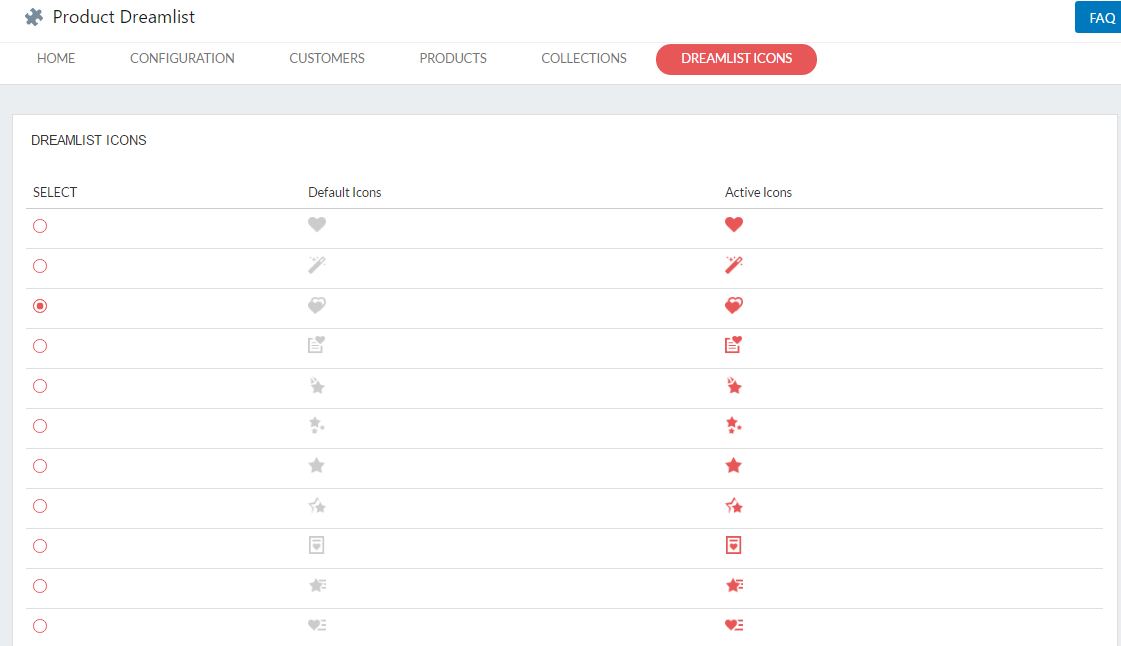
Finally the very important and the last section of this user manual, in order to display add to the dreamlist icon on the front end you will have to click on “configure frontend” section and copy the given code and paste it to respective .liquid file
follow the below process:
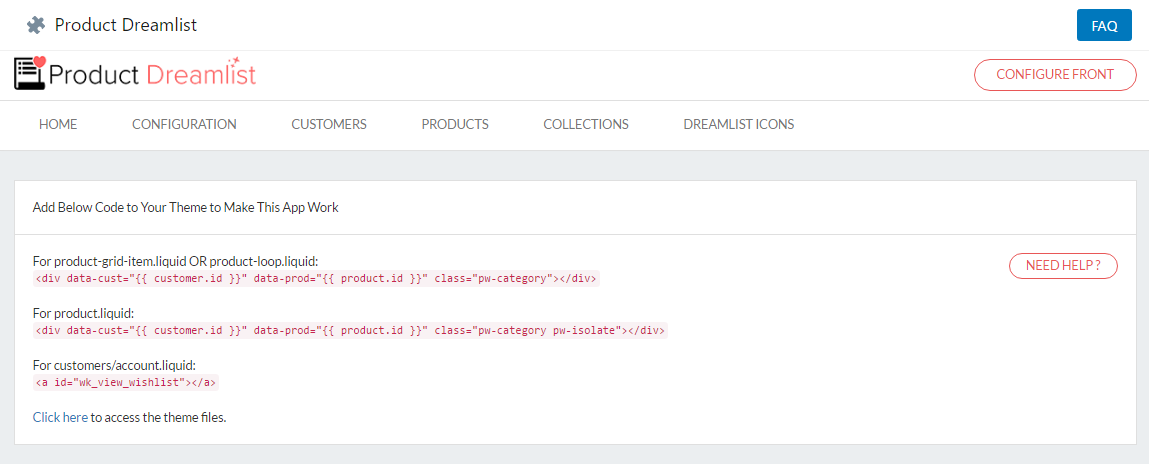
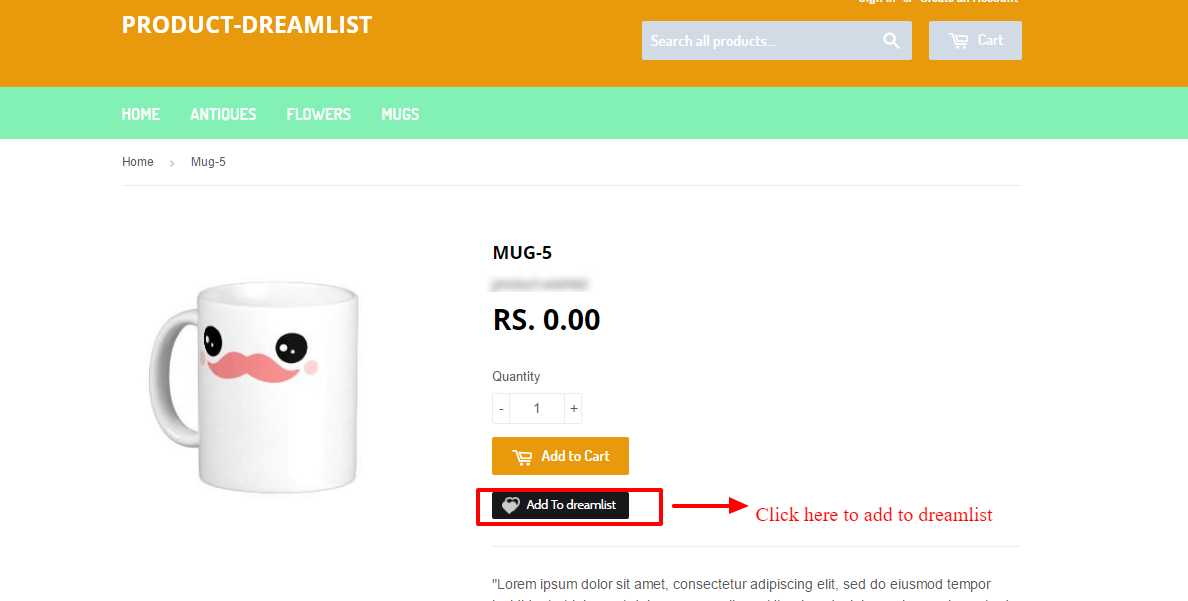
Once you will paste the code in .liquid files, then your customers will see the dreamlist icon on the product page, something like this:
To view all the products added or all the dreamlist created as a customer, go to my account page and click on Dreamlist icon. (Refer to the image below)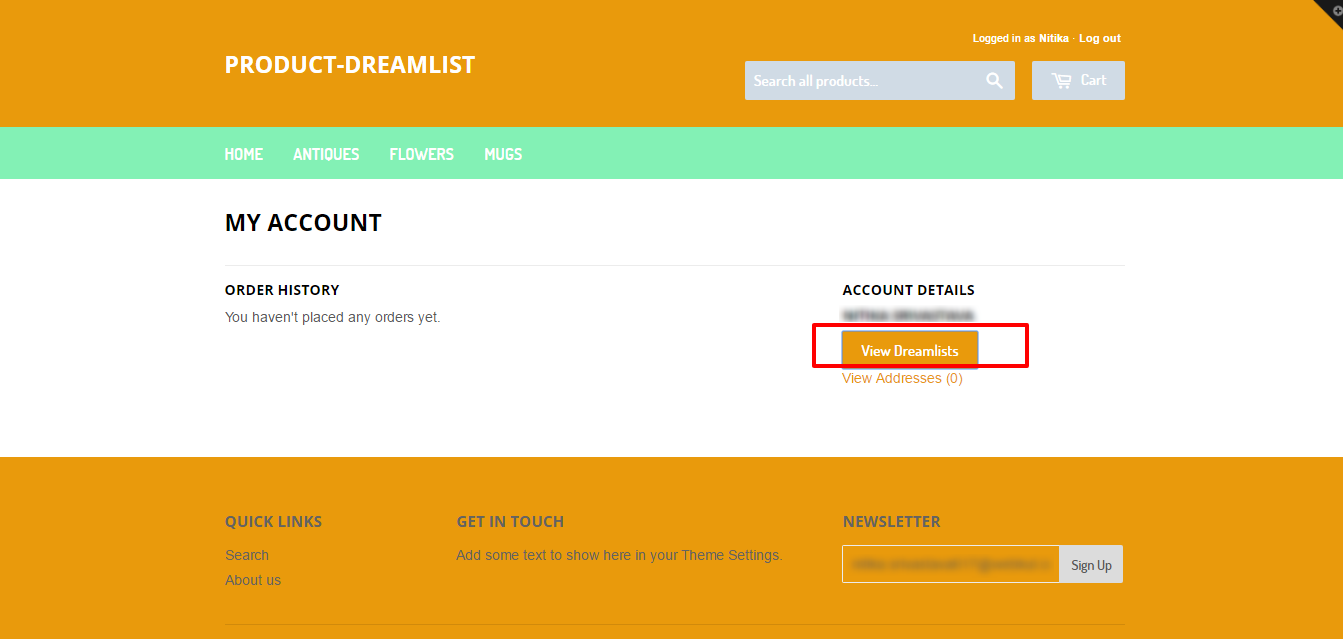
Once you will click on the dreamlist button, you will see different dreamlist categories thumbnails with products added in it, and from here you can also create a new category and edit the already existing one.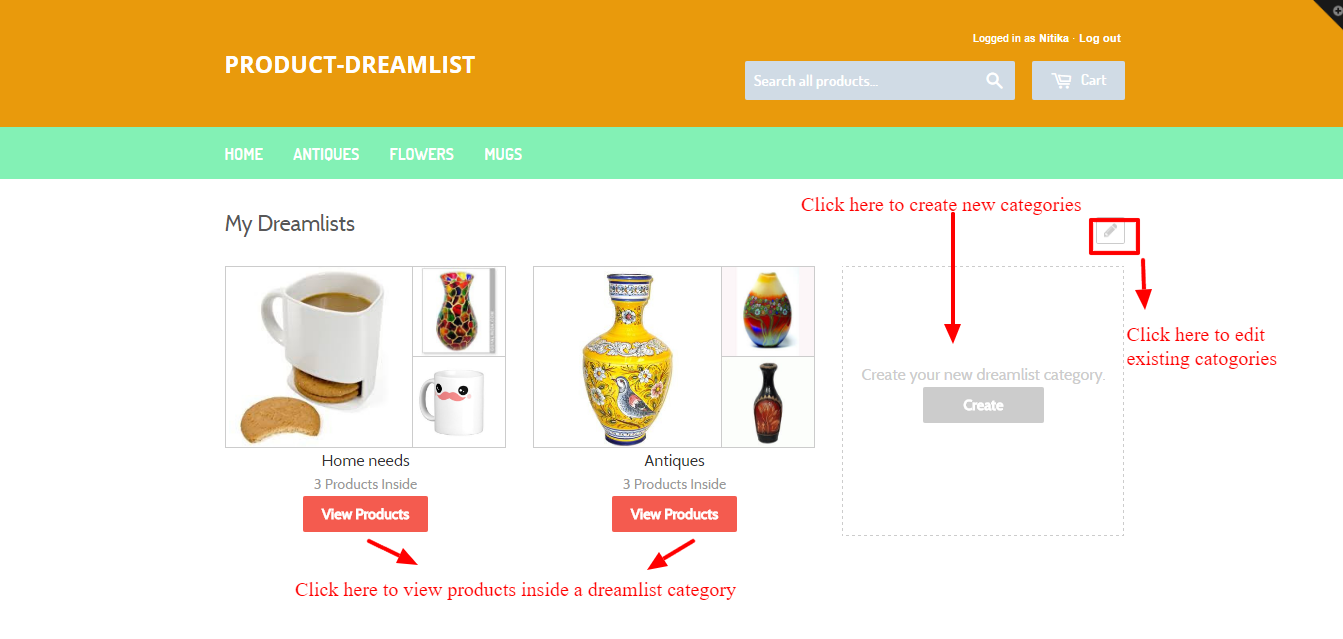
Clicking on view products button, the list of products added in the dreamlist will appear and from there you can delete any added product as well.

Looking for anything specific article which resides in general queries? Just browse the various relevant folders and categories and then you will find the desired article.
Contact Us